How To Install Liquid Cooling On Cpu – Keep Your Cpu Running Cool!
Liquid cooling efficiently removes heat from a CPU by circulating coolant through a system. This guide provides a step-by-step process for installing it for optimal performance and aesthetics.
This guide will take you through the process step by step, using simple language for easy understanding.
Table of Contents
What is Liquid Cooling?
Liquid cooling is a cooling method that uses liquid coolant to transfer heat away from computer components, primarily the CPU. The coolant circulates through a water block attached to the CPU, moving heat to a radiator for dissipation. This system is more efficient than traditional air cooling, allowing for lower temperatures and quieter operation. Liquid cooling is popular among gamers and enthusiasts seeking optimal performance and aesthetics.
How Does Liquid Cooling Work?
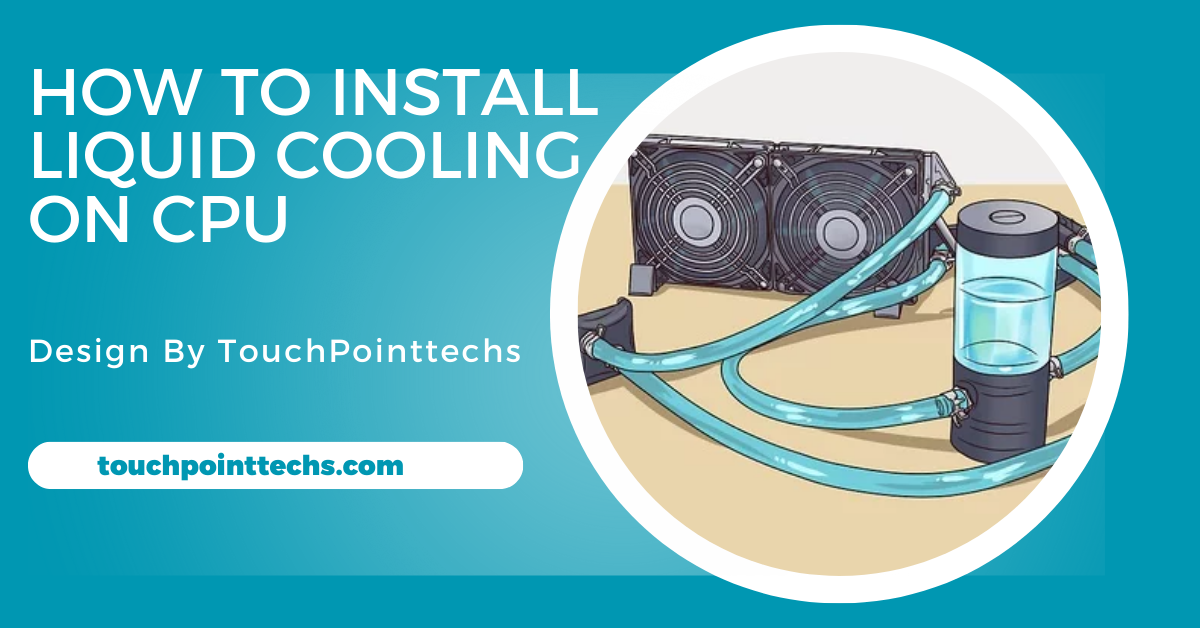
Water Block: The water block is the component that makes direct contact with the CPU. It contains channels designed for the liquid coolant to flow through, ensuring efficient heat transfer. As the CPU generates heat, the water block absorbs it and carries it away, helping to keep the processor cool.
Pump:
The pump is a crucial part of the liquid cooling system, responsible for circulating the coolant. It moves the heated liquid from the water block to the radiator, where the heat is dissipated. A strong and reliable pump ensures that the coolant flows effectively throughout the system, maintaining optimal temperatures.
Radiator:
The radiator plays a vital role in cooling the liquid before it returns to the CPU. It consists of a series of fins that increase the surface area for heat dissipation. Fans mounted on the radiator blow air over its surface, helping to cool the liquid as it passes through, ensuring that only cool liquid circulates back to the CPU.
Tubes:
Flexible tubes connect the water block to the radiator, allowing for unrestricted coolant flow. These tubes are designed to withstand the pressure and temperature changes within the system. Properly secured tubes are essential to prevent leaks and ensure the coolant circulates smoothly without obstruction.
Types of Liquid Cooling Systems:
Liquid cooling systems are available in two main types: custom loops and all-in-one (AIO) systems. Custom loops allow for greater flexibility and performance but require more complex setup and maintenance. AIO systems, on the other hand, come pre-assembled, making them easier to install and ideal for users who prefer a straightforward setup without the hassle of custom configurations.
Why Choose Liquid Cooling?
- Better Cooling Performance: Liquid cooling efficiently transfers heat, keeping high-performance CPUs at lower temperatures, especially during intense tasks like gaming or video editing.
- Quieter Operation: These systems often use larger, slower fans, resulting in quieter performance compared to traditional air coolers, making them ideal for noise-sensitive environments.
- Space Efficiency: Liquid cooling components take up less space around the CPU, allowing for better RAM clearance and airflow, which can enhance overall system performance.
- Aesthetics: Many liquid cooling solutions feature customizable RGB lighting and sleek designs, adding visual appeal to your setup and allowing for a personalized look.
Step-by-Step Guide to Install Liquid Cooling:
Step 1: Prepare Your Workspace
Ensure you have a clean, well-lit area to work. Clear your desk of any unnecessary items to avoid confusion. It’s also a good idea to have a bowl or container for screws and small parts to prevent losing them.
Step 2: Turn Off Your Computer
- Shut down your computer: Click the shutdown option in your operating system.
- Unplug all cables: Disconnect the power cable, monitor, keyboard, and any other peripherals.
Step 3: Open Your Computer Case
- Remove screws: Use a screwdriver to take out the screws holding the side panel in place.
- Take off the side panel: Gently slide or lift the panel away to access the internal components of your computer.
Step 4: Remove the Old CPU Cooler
Disconnect the old cooler:
- Find the power cable connected to the old cooler and unplug it from the motherboard.
Remove screws or clips:
- Depending on the cooler type, either unscrew it or unclip it from the CPU.
Gently twist and pull:
- Carefully twist the cooler to break the thermal paste seal, then pull it off the CPU.
Step 5: Clean the CPU
Remove old thermal paste:
- Use a cloth or paper towel to gently clean off the old thermal paste from the CPU. You can use isopropyl alcohol for a better clean.
Ensure a smooth surface:
- Make sure the CPU surface is completely clean and free of any residue.
Step 6: Apply Thermal Paste
- Squeeze out a small amount: Apply a pea-sized amount of thermal paste in the center of the CPU.
- Spreading (optional): While it’s not necessary, you can use a plastic spatula to spread it evenly, but this is often not required since the pressure from the cooler will spread it out.
Step 7: Install the Water Block
- Align the water block: Position the water block directly over the CPU, ensuring it aligns with the mounting holes.
- Secure the water block: Use screws to attach the water block to the motherboard. Tighten them in a crisscross pattern to apply even pressure. Be careful not to overtighten.
Step 8: Install the Radiator and Fans
- Choose a location for the radiator: Common placements are at the top, front, or back of the case. Check your case compatibility and airflow direction.
- Attach the fans: If the radiator has fans, attach them first. Ensure they are facing the right direction for optimal airflow—typically, fans should pull air in from outside the case or push air out.
- Secure the radiator: Use screws to attach the radiator to your case. Make sure it is firmly in place.
Step 9: Connect the Tubes
- Connect the tubes to the water block: Attach one tube from the water block to the inlet on the radiator and the other tube from the radiator back to the water block’s outlet.
- Check for kinks: Ensure that the tubes are not bent or kinked, as this can restrict liquid flow and reduce cooling efficiency.
Step 10: Fill the Reservoir (If Applicable)
- If your cooling system has a reservoir, carefully fill it with the recommended coolant. Follow the manufacturer’s instructions to avoid overflow.
Step 11: Connect Power Cables
- Power the pump: Locate the power cable for the pump and connect it to the appropriate header on the motherboard, usually labeled “PUMP” or “CPU FAN.”
- Connect the fans: Plug the radiator fans into the motherboard or a fan controller, ensuring they are connected to the right headers for proper fan speed control.
Step 12: Check for Leaks
- Turn on the power: Plug your computer back in and turn it on.
- Check for leaks: Inspect all connections, including the water block, tubes, and radiator, for any signs of leaks. If you see any, turn off the computer immediately and resolve the issue before proceeding.
Step 13: Monitor Temperatures
- After installation, monitor your CPU temperatures using software like HWMonitor or Core Temp. Ensure that the temperatures remain within safe limits, especially under load.
Maintenance Tips for Liquid Cooling:
To keep your liquid cooling system running efficiently, follow these tips:
- Check Liquid Levels: Regularly inspect coolant levels, especially in systems with a reservoir. Low levels can lead to overheating, so check every few weeks, especially during heavy use.
- Clean the Radiator and Fans: Dust can accumulate in the radiator and fans, reducing cooling efficiency. Use compressed air to clean these components every few months and ensure the case is clean for better airflow.
- Replace Liquid: If the coolant looks cloudy or dirty, it may need replacement. Follow the manufacturer’s instructions for draining and refilling the liquid, and replace it every 1-2 years to maintain performance.
Common Issues and Troubleshooting:
- Pump Noise: If you hear unusual noises from the pump, check for air bubbles in the system and ensure the pump is securely connected.
- High Temperatures: If temperatures are higher than expected, double-check the thermal paste application and ensure that the radiator is unobstructed by dust or other components.
- Leaking: If you notice leaks, turn off your computer immediately. Tighten connections or replace components as needed.
FAQ’s
1. What is liquid cooling?
Liquid cooling uses a coolant to absorb heat from the CPU, circulating it through a water block and radiator for efficient cooling.
2. How do I install liquid cooling?
To install liquid cooling, prepare your workspace, turn off your computer, remove the old cooler, clean the CPU, apply thermal paste, and follow the specific steps to install the water block, radiator, and connect the tubes.
3. What are the benefits of liquid cooling?
Liquid cooling offers better cooling performance, quieter operation, space efficiency, and attractive aesthetics compared to traditional air cooling solutions.
4. How often should I maintain my liquid cooling system?
Check liquid levels and clean the radiator and fans every few months, and replace the coolant every 1-2 years for optimal performance.
5. What should I do if I notice a leak?
If you detect a leak, turn off your computer immediately and check all connections. Tighten any loose fittings or replace components as needed before restarting.
Conclusion
In conclusion, liquid cooling is an efficient solution for managing CPU temperatures, enhancing both performance and aesthetics. By following the outlined steps, you can successfully install a liquid cooling system, ensuring your setup runs quietly and efficiently. Regular maintenance, including checking coolant levels and cleaning components, is essential for long-term reliability and optimal performance.


